The process for configuring Idealpos for VDMS Vending is outlined as follows:
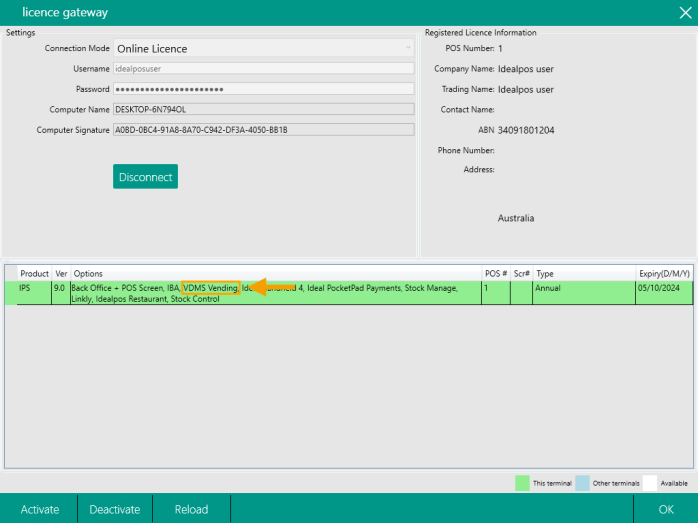
The VDMS Vending Module will need to be enabled in the Idealpos License Gateway for each POS Terminal that will utilise it.
Contact Idealpos or your Idealpos Reseller to purchase this module.
Once the module has been purchased, go to: Back Office > Setup > Licence Gateway.
Press the "Reload" button in the Licence Gateway and the "VDMS Vending" module will be displayed.
If the VDMS Vending Module does not appear after pressing the "Reload" button, contact Idealpos or your Idealpos Reseller.
After the Licence Gateway has been reloaded, perform a Close Suite/Open Suite.
Go to: Start > Idealpos > IPSUtils > Close.
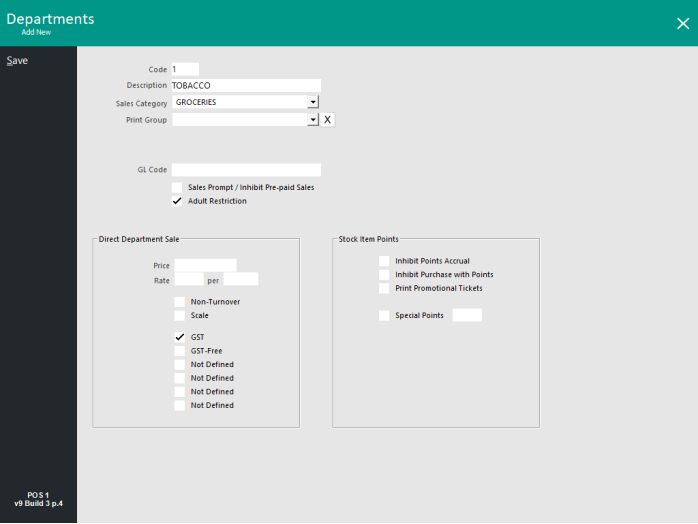
As VDMS Vending is primarily designed for Tobacco, a Tobacco Department will need to exist in Idealpos.
If a Tobacco Department doesn't already exist, create a new Department by going to:
Back Office > File > Sales > Departments > Add > Enter the Department Name and any other options that are required for the Department.
If required, the Adult Restriction checkbox option can also be enabled.
The configuration of the Adult Age Restriction functionality is outlined in further detail in the Adult Age Restriction topic of the User Guide.
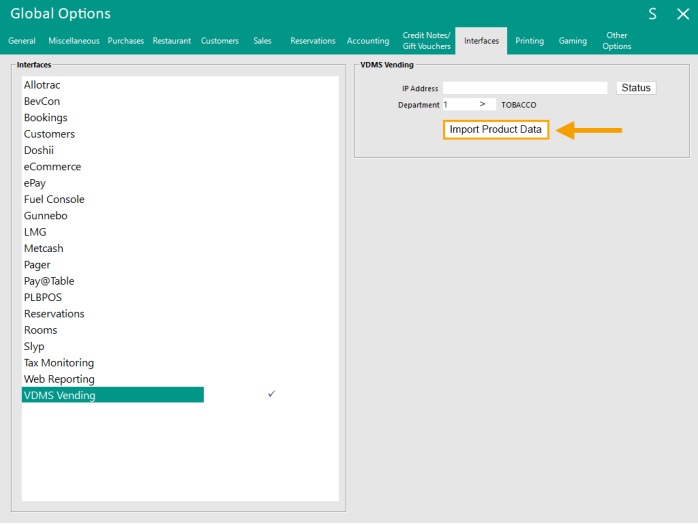
Once the Department has been created, go to: Back Office > Setup > Global Options > Interfaces > VDMS Vending.
IP Address: Enter the IP Address supplied by VDMS Vending. When entering the IP Address, ensure that the Port Number 8092 is entered after the IP Address. E.g. If the IP Address is 192.168.1.1, enter 192.168.1.1:8092 into the IP Address field.
Department: Select the Tobacco Department created in the previous step.
Status button: This can be pressed to display a popup prompt that will return the current status from VDMS.
Once the above fields have been configured, press the "Import Product Data" button.
A confirmation prompt will be displayed.
Press "Yes" to continue with the import of the Product Data.
After a short period, a response will be returned, typically "Import Product Data successful".
If there are any issues during the Import Product Data, the message prompt that is displayed will reflect this.
Press "OK", then close Global Options.
The configuration of this interface also involves the creation of Dynamic POS Screen Grids that will be used for displaying Tobacco Stock Items.
The Dynamic POS Screen Grids can be configured to only show items that are linked to specific Attributes (e.g. specific Tobacco pack size).
Other Attributes can also be created as required, such as Tobacco Brands, etc. and these can be configured within the Dynamic POS Screen Grid.
It isn't necessary to create Attributes, however, if the above functionality is desired, then this step can also be completed.
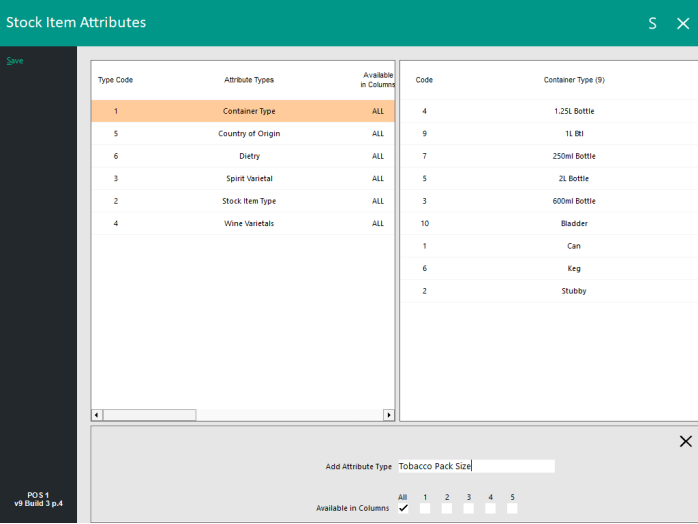
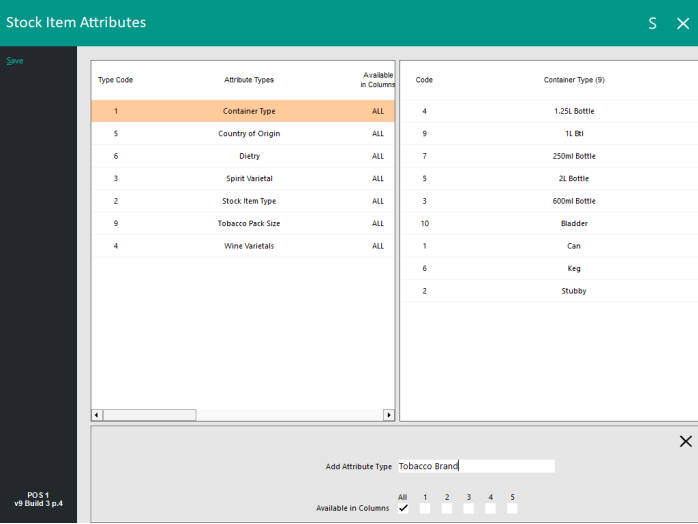
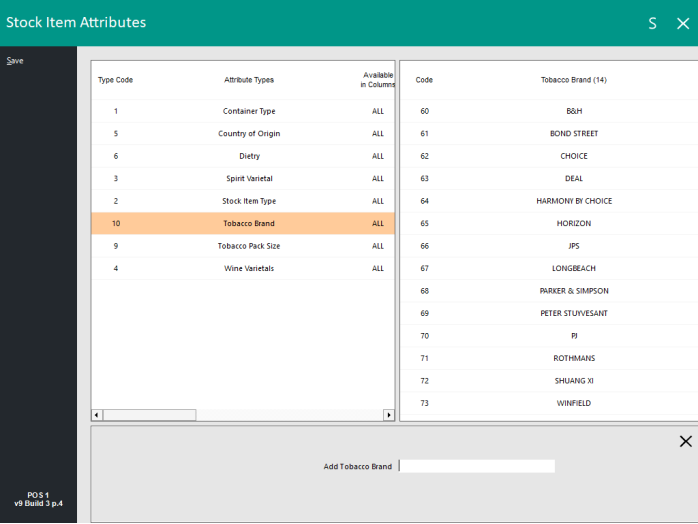
Go to: Back Office > File > Sales > Stock Item Attributes > Add New Attribute Type.
Attribute Type: Tobacco Size
Press "Save" to create the new Attribute Type.
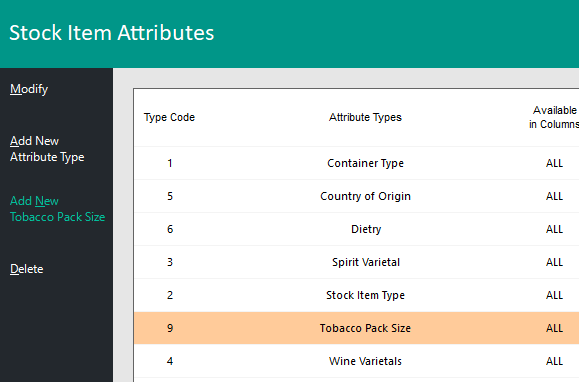
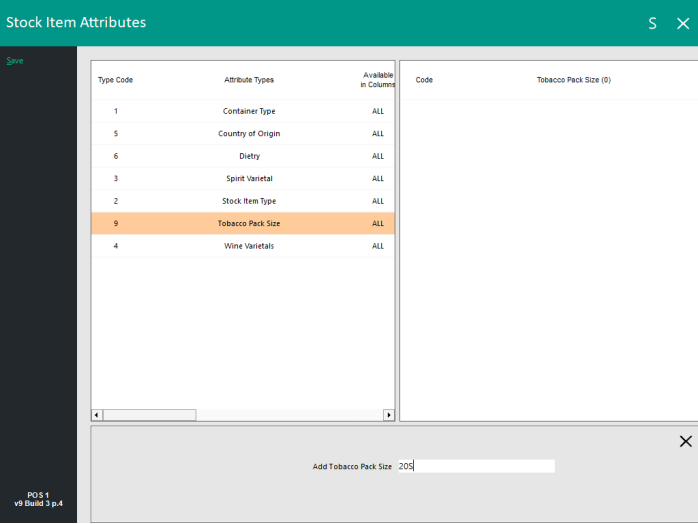
While the "Tobacco Pack Size" is selected, press the "Add New Tobacco Pack Size" button on the top-left corner.
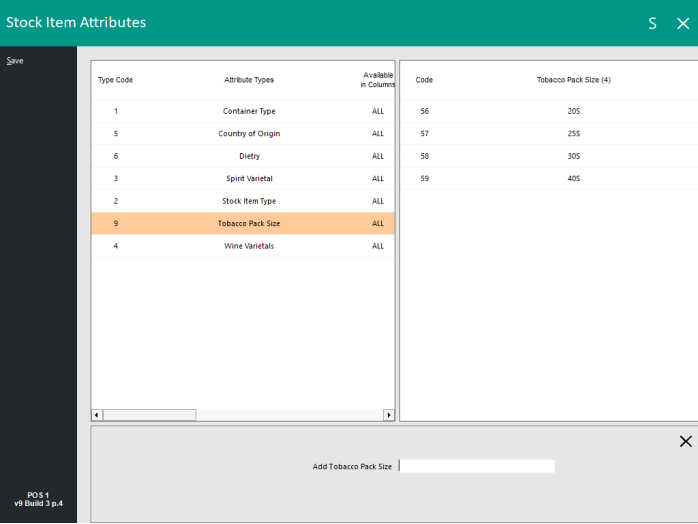
Create new Attributes for each Tobacco Pack Size as required (e.g. 20S, 25S, 30S, 40S, Carton, etc.).
Press "Save" on the top-left corner after entering each Pack Size.
Alternatively, the Enter key on the keyboard can be pressed after entering a new Tobacco Pack Size which will also create a new entry for the new Pack Size.
Once completed, a list of Pack Sizes will be displayed in the Stock Item Attributes window.
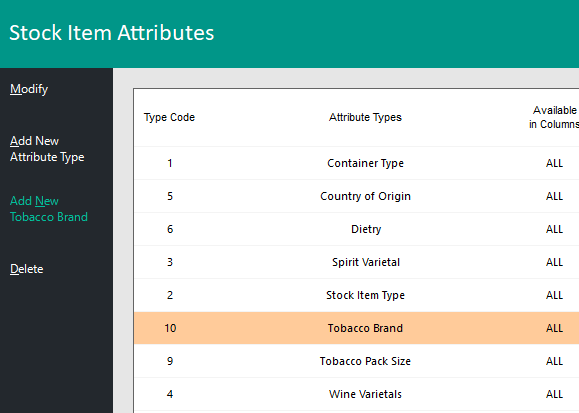
Additional Attribute Types/Attributes can be created if required (Brand Names or any other required attributes).
Once the Attribute Types and Attributes have been created, close the Stock Item Attributes window.
The Tobacco Stock Items may need to have Sell and Cost Prices manually entered.
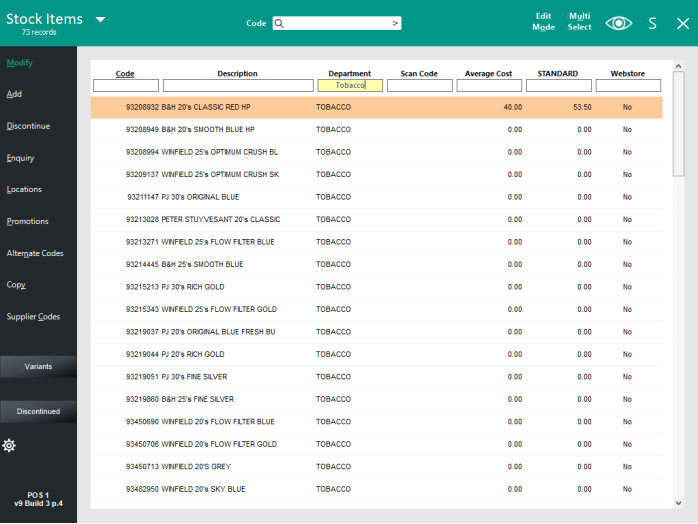
Go to: Back Office > File > Stock Control > Stock Items.
Enter "Tobacco" into the Department field to only show Tobacco Items > Manually modify each Stock Item's Sell Price Levels and Cost Price as required.
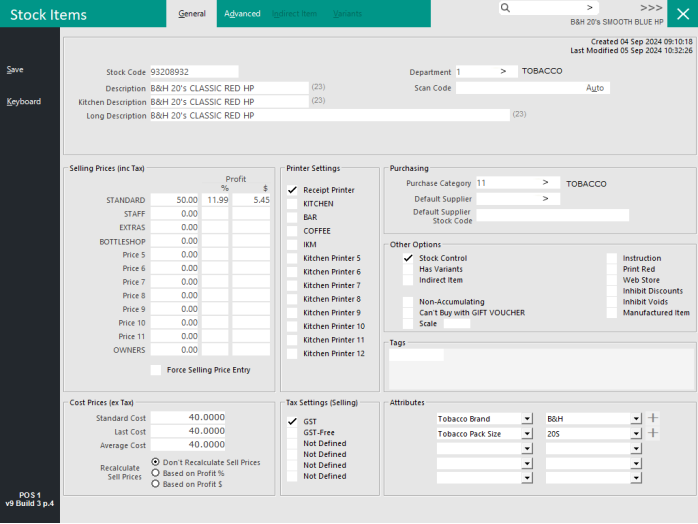
Any other required modifications to the Stock Items can also be done at this time (such as entering the Purchase Category, Default Supplier, Default Supplier Stock Code, etc.).
If Attribute Types and Attributes were created in the previous step above, these can be assigned to the Tobacco Stock Items during this process (i.e. link to Pack Sizes, Brands, any other attributes as required).
Once the Tobacco Stock Items have been updated with Sell Prices, Cost Prices and any other required changes, close the Stock Items grid.
If mass changes are required to the Tobacco Stock Items, this can be done via the Range Programming function accessible via:
Back Office > Utilities > Range Programming > Stock Items.
Refer to the Range Programming topic for further details about using the Range Programming Function.
To prevent dispensing unavailable Tobacco Stock Items from the VDMS Vending Dispenser when the Stock Level drops to 0, the Availability function in Idealpos can be used to prevent the sale of Stock Items once the Stock Level drops to 0.
This will trigger the Stock Level to be displayed on the Tobacco Stock Item POS Screen button so that the Clerk can see the level available, and when it reaches zero, the button will be unavailable.
When the Tobacco Stock Items were imported in the above steps, the Availability for all Tobacco Stock Items should have been set as "Unavailable when Stock Level reaches Zero".
The Stock Item Availability is set in the Advanced tab of each Stock Item.
If further information is required about the Stock Item Availability function, refer to the Availability page in the User Guide.
When Tobacco Stock Items were imported, the Stock Level data may have been imported as well which should correspond to the Stock Level of each item in the VDMS Vending Dispenser.
If the Stock Level isn't received or there's a mismatch between the Idealpos Stock Level and Stock Level of a Tobacco Stock Item in the VDMS Vending Dispenser, the Stock Level can be adjusted using one of the following methods:
Dynamic POS Screen Grids can be created by going to:
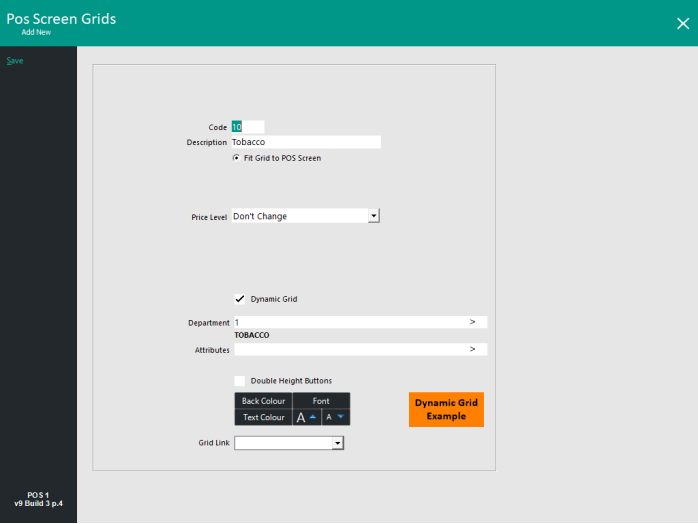
Back Office > Setup > POS Screen > Grids > Add.
Description: Tobacco
Dynamic Grid: Enabled
Department: Select the Tobacco Department by pressing the ">" button and choose the Tobacco Department from the list.
Attributes: Leave as blank
Button Customisation (Double Height Buttons, Back Colour, Font, Text Colour, Text Size) - Customise the button appearance as required. All Stock Item buttons that appear within the Dynamic Grid will appear using this appearance.
Grid Link: Set this to the desired Grid Link. This option controls which POS Screen Grid will be displayed after a Stock Item is added to the sale from the Dynamic Grid.
If you leave this option as blank, the Grid Link will default to itself after the Dynamic POS Screen Grid is saved (this will cause the Dynamic Grid to remain on-screen after an item is added to the sale from the Dynamic Grid).
The Clerk can press the Back button within the Dynamic Grid to return to the main POS Screen.
If the MAIN POS Screen is required to appear after a Tobacco item is added from the Dynamic Grid, then select the "MAIN" option from the Grid Link dropdown box.
Once the Dynamic Grid has been configured and customised as required, press "Save" on the top-left corner.
If Attribute Types were configured in the previous steps, additional Dynamic Grids can be created for these Attributes.
Create a new Dynamic Grid.
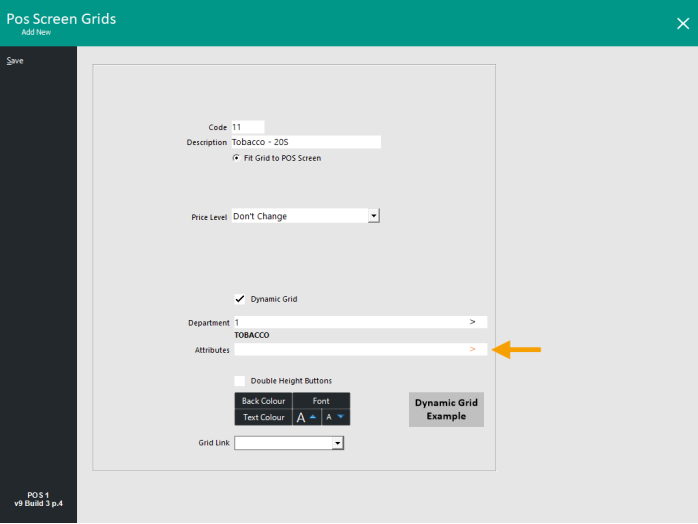
Description: Enter a Description that reflects the Attributes which will be used for the button to identify the items that will be displayed by the Dynamic Grid (e.g. Tobacco - 20S).
Attributes: Press the ">" button in the Attributes field.
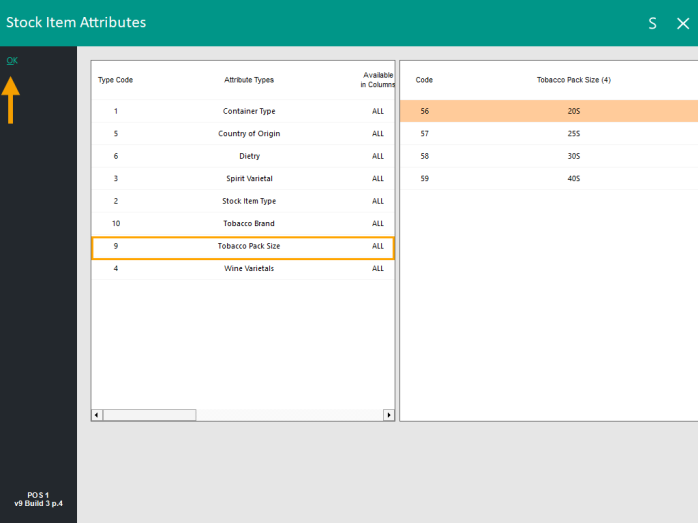
Select "Tobacco Pack Size", then select the size (e.g. 20S) > OK.
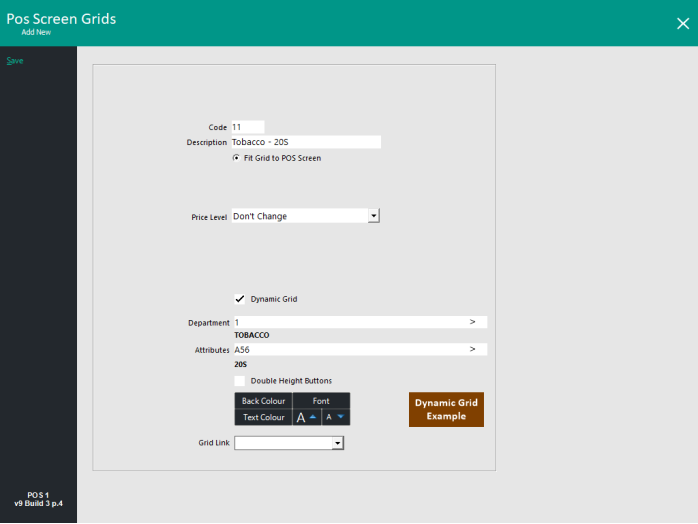
The Attributes field will be populated and the Pack Size(s) shown below.
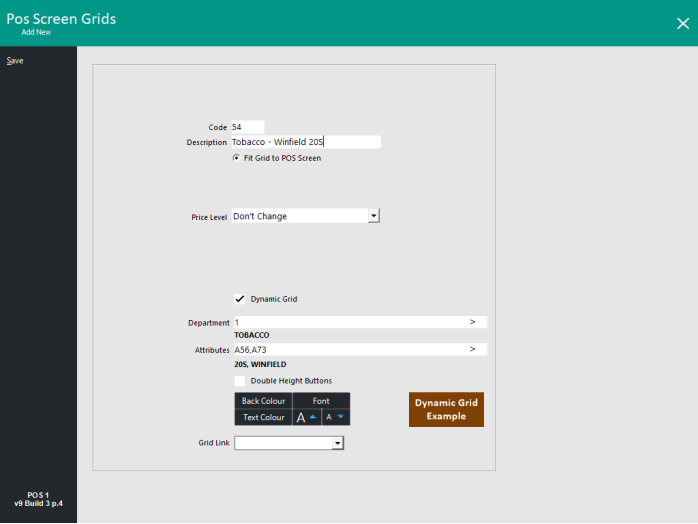
Note that multiple Attributes can be combined by clicking on the ">" button again within the Attributes field to select an additional Attribute (e.g. if multiple Pack Sizes are required to appear on the same Dynamic Grid).
It is also possible to combine two different Attribute Types (e.g. A specific Tobacco Brand and a specific Tobacco Pack Size, and only Stock Items that are linked to those Attributes will be displayed in the Dynamic Grid, provided that those items have been linked correctly to their respective Attribute Types/Attributes).
A maximum of 3 Attributes can be entered/selected in the Attributes field.
The setup of the Dynamic Grid can vary depending on the customisation required by the venue and how they want the Tobacco items to appear on the POS Screen.
The below is an example of combining a Tobacco Brand and a Pack Size.
Create as many Dynamic POS Screen Grids as required, each one linked to the Attributes as required.
The final step for setting up the integration is to add links to the Dynamic POS Screen Grids to the POS Screen.
Go to: Back Office > Setup > POS Screen > POS Screen Setup > Select POS Screen Layout > Buttons.
Locate a POS Screen tab that contains blank POS Screen buttons that will be linked to the Dynamic Grids configured above.
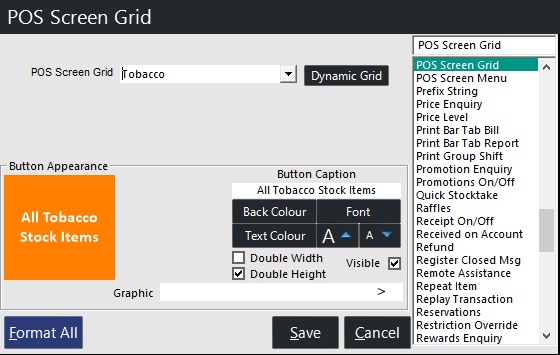
Configure the button(s) as follows.
Function: POS Screen Grid.
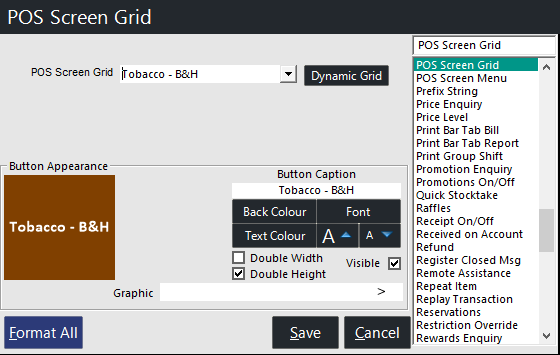
POS Screen Grid: Select "Tobacco" from the dropdown box.
Button Appearance: Customise as required.
Button Caption: Customise as required. This can reflect the Stock Items included in the Dynamic Grid.
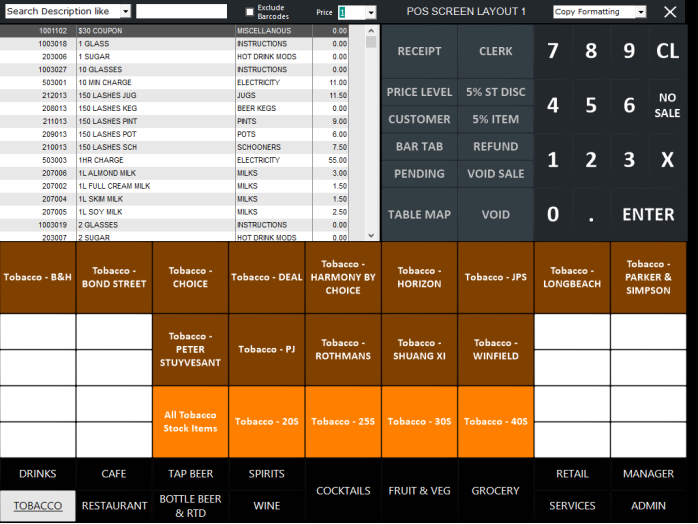
If multiple Dynamic Grids were created in the steps above, then repeat the above process for creating a separate POS Screen Button for each Dynamic Grid.
E.g. Tobacco - B&H, Tobacco - BOND STREET, etc.
Once complete, the POS Screen Grid will contain numerous buttons linked to the Dynamic POS Screen Grids.
This may vary depending on the colour preferences and Tobacco Stock Items listed on the POS Screen; this is simply an example.